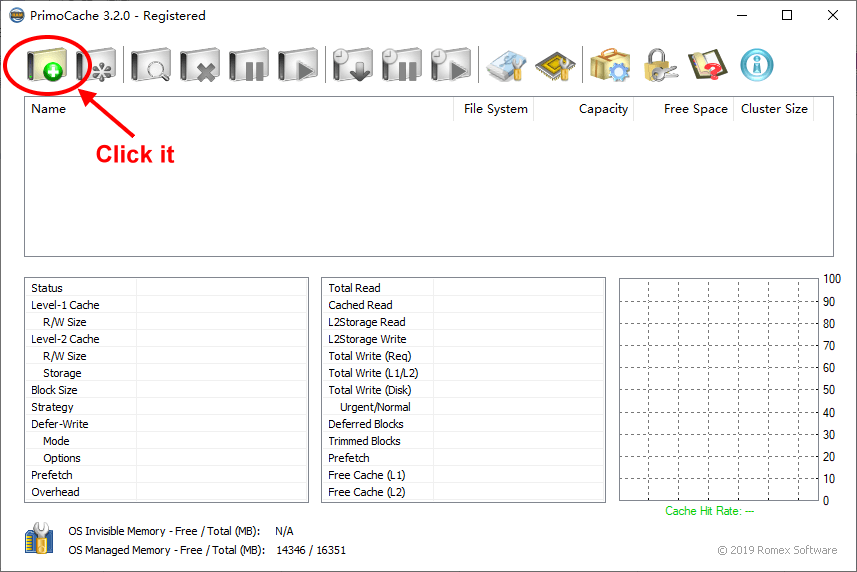
To accelerate the disks which are of interest to you, you need to set up a cache task for these disks. PrimoCache provides a wizard to help you easily create a new cache task. Click on the  icon button in the command toolbar to start the wizard, and then follow the directions in the wizard screens, as described in the following sections.
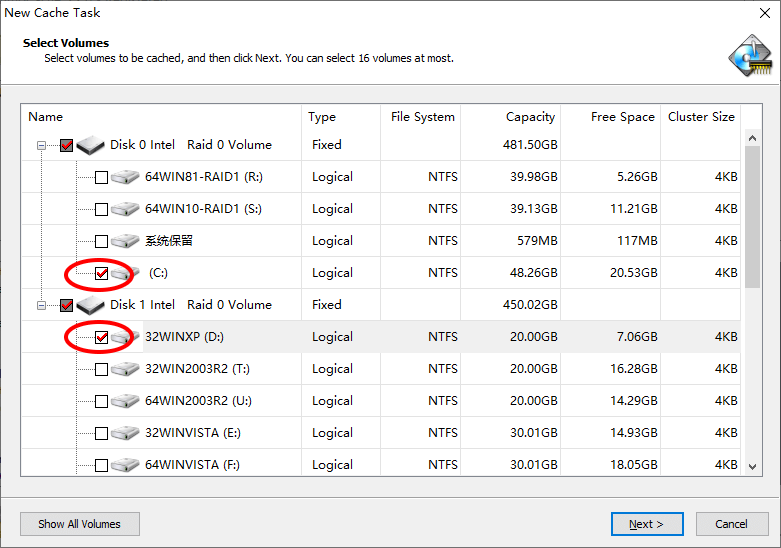
Step 1: Select Destination Volumes
Check the boxes next to the volumes you want to be accelerated by this cache task. Then click Next. You are able to choose up to 16 volumes which can even be on different physical disks. Don't choose the volume that you will use as SSD cache to accelerate other disks.
Step 2: Configure Parameters
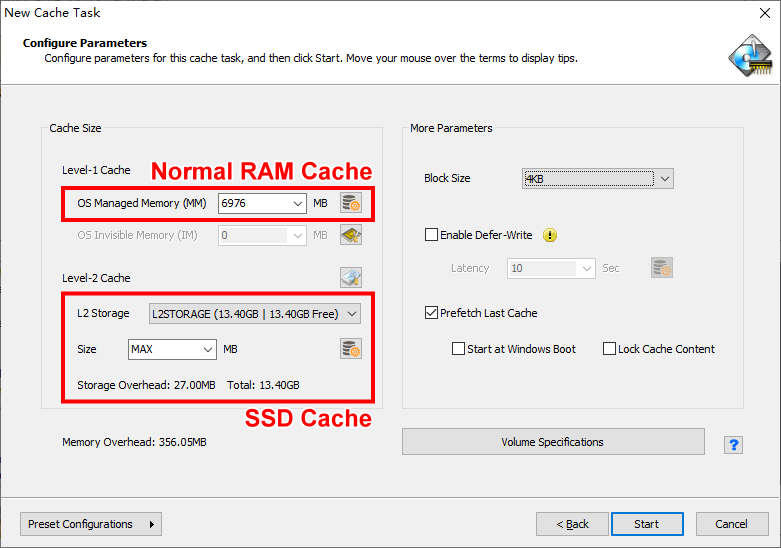
This wizard page is to configure the parameters for the new cache task. PrimoCache provides a "Preset Configurations" menu where you can choose a configuration close to your needs, if you are not familiar with these parameters. PrimoCache will preset the parameters based on the configuration you choose, and then you can adjust any parameter to best fit your needs. Move your mouse over a parameter field to see a brief explanation for this parameter. For a comprehensive definitions of cache configuration parameters, see Configuration Terms.
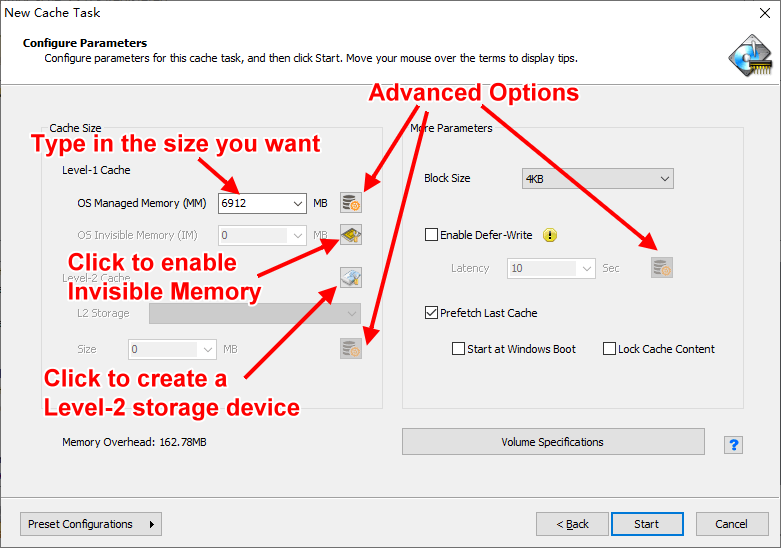
If you have some physical memory not visible to Windows OS, usually this happening in 32-bit Windows with 4GB or more memory installed, you can use this hidden memory as cache to speed up disks. Click on the  button to enable the Invisible Memory feature if this is the first time you use Invisible Memory. For additional help on how to set up Invisible Memory, see UIMMI.
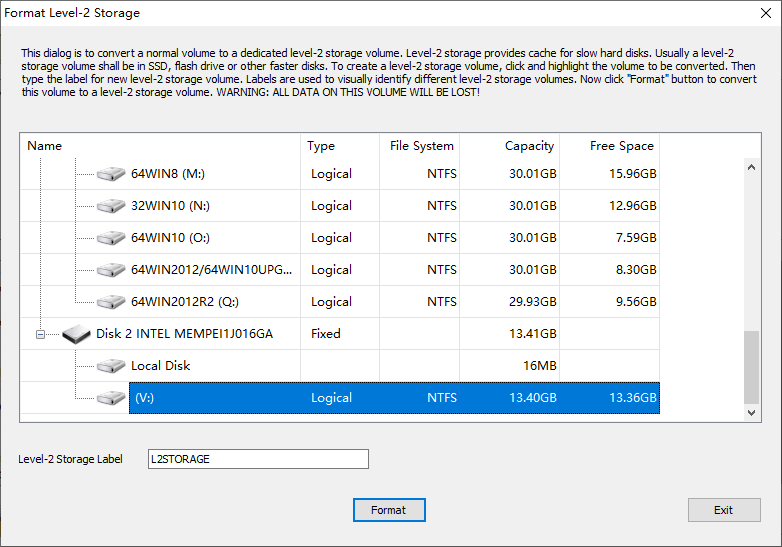
If your computer has both mechanical hard disks (HDDs) and solid-state disks (SSDs) or USB3.0 flash drives installed, you are able to use a portion or all of the SSD or flash drive as a cache device to accelerate HDDs. To do so, you need to create a dedicated level-2 storage volume on the SSD or flash drive first. Click on the  button to pop up the format dialog to convert a normal volume into a level-2 storage volume if you haven't had one. See Creating Level-2 Storage for more help.
If your computer has only HDDs or only SSDs installed, you have no need to set up level-2 cache, just leaving it greyed or setting the size to 0.
The following figure shows an example of the cache configuration with both RAM cache and SSD cache.
When you finish the configuration, click Start to create this new cache task. Once it is successfully created, data caching for these chosen volumes will start working immediately, no reboots or additional configuration needed. You can see this new cache task in the PrimoCache main dialog and monitor its cache status and statistics.
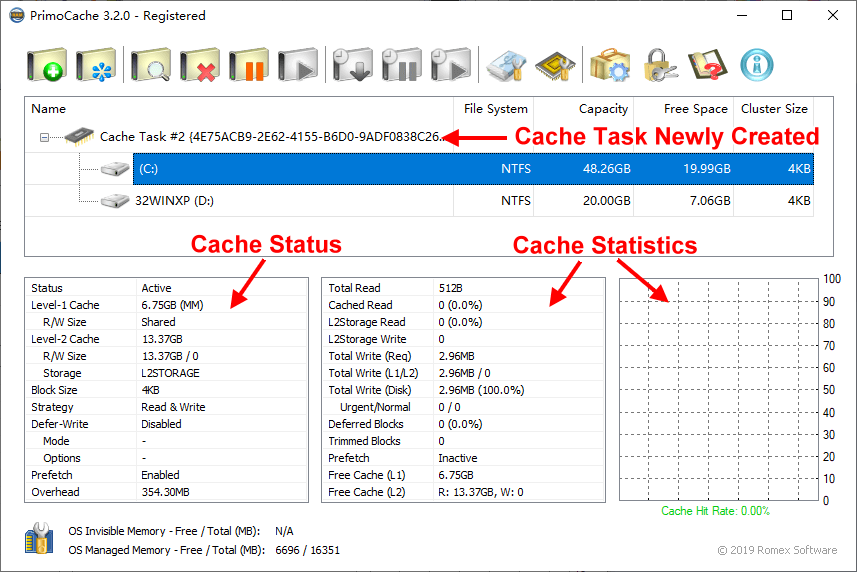
The cache task keeps working even you exit the PrimoCache application, and automatically starts with Windows startup. You have to explicitly stop the caching when you don't need it any more.
Now enjoy the benefits gained from the data caching. At first, you may not notice much performance improvement, but this is due to the simple fact that no data has yet been stored to the cache. As you continue to use the computer, more and more data will get saved to the cache, resulting in better and better system performance.